and how the Atari-version looks like:

The Atari source of the MT-Manager was provided by Glenn Bruner.
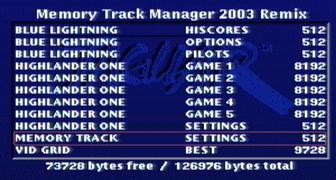
The start screen of the enhanced version:
and how the Atari-version looks like:
This page is not intended to be a complete manual, it only describes the
enhancements over the old version of the MT-manager.
As you can see, there are some obvious changes like the blue background colour or the white text colour.
There are four enhancements to the functionality:
List of available commands:
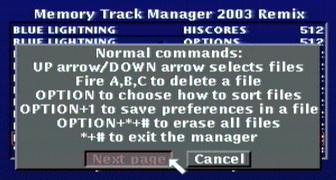
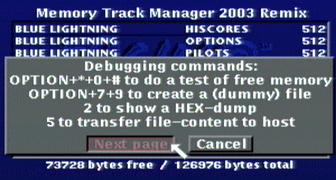
Press PAUSE in the main screen to get a list of MT-manager commands:
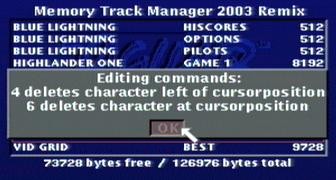
BACKSPACE and DELETE in input-windows:
The text-cursor is at the 'L', indicated by the red rectangle surrounding this character:
Now press key 4 (BACKSPACE) twice to delete the two characters left of the text-cursor and you'll get this as content of the input-window:

Now press key 6 (DELETE) twice to delete the character at the position of the text-cursor and you'll get this as content of the input-window:
File-content browser:
Press key 2 in the main screen to start a file-content browser:
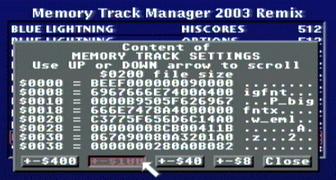
Choose the scroll-offset using the buttons at the bottom of the dialog-box, and use UP and DOWN on the joypad to scroll through the file-content.
XModem-transfer of file-content:
Thanks again to Glenn Bruner for providing the UART-access- and XModem-functions and the HyperTerminal-related images!
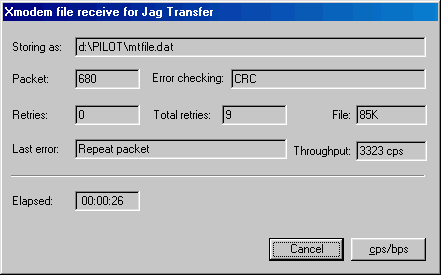
This new MT-manager not only offers to view the file-content, but you can also send the file-content to another computer using a standard serial line.
This is done using a serial connection between the Atari Jaguar and the other computer.
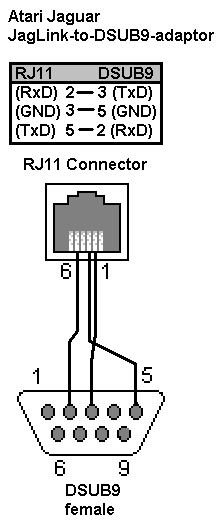
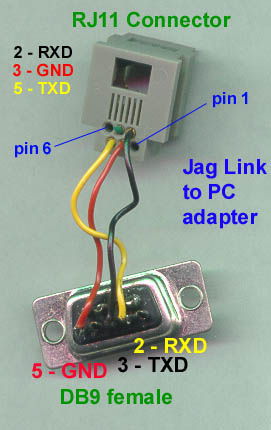
You will need either a ICD catbox or a Atari JagLink with an additional RJ11-to-DSUB9(or-DSUB25)-adapter to be able to connect the Jaguar and the other computer.
Here is a schematic if you need to build your own adaptor and how it looks in real:
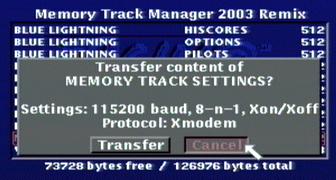
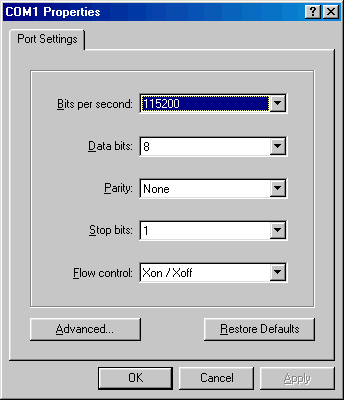
The com-port settings are 115200 baud, 8 data-bits, no parity, 1 stop-bit. Use Xon/Xoff as flow control.
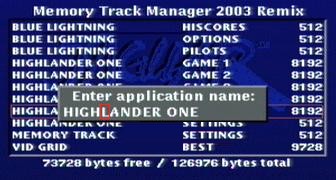
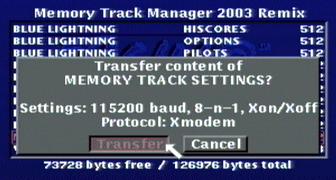
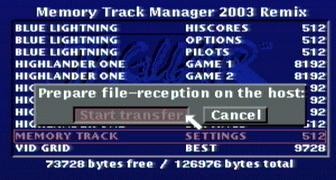
Select the desired file in the MT-manager main screen (we will use the file MEMORY TRACK SETTINGS here) and press key 5 to get this dialog-box:
This dialog-box gives you time and opportunity to prepare your favorite communication-software on the connected computer.
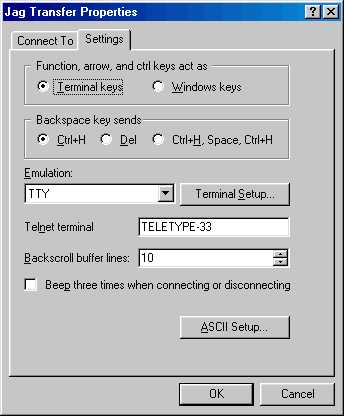
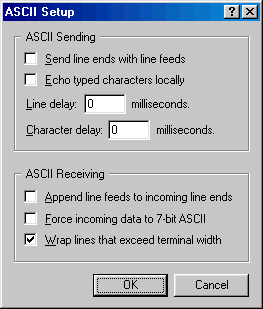
Here is a description of the proper setup of the familiar MS Windows HyperTerminal-program:
As soon as you are sure that everything is set up in the right manner, select the "Transfer"-button and depress any Firebutton to activate it.
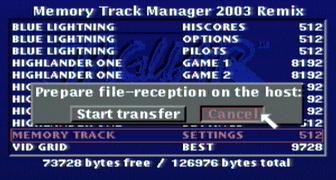
This will not only lead to the next dialog-box, but additionally the Jaguar will send a character-string saying "Receive 'file-name'?" to the connected computer.
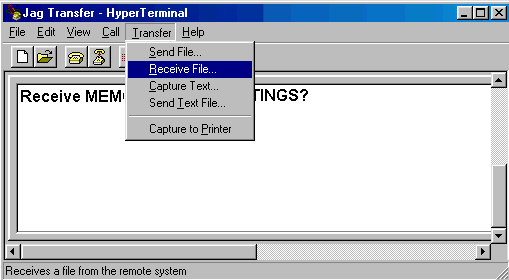
Now you should tell your communication-program that you want it to receive a file using the XModem-protocol.
Again, looking at HyperTerminal:
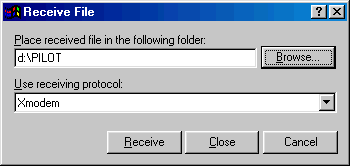
Select "Receive File..." from the "Transfer"-menu:
Now select the XModem-transfer-protocol and enter the folder-name where the received file should be stored:
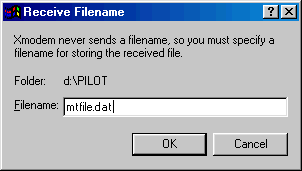
In order to receive a file using XModem, the software will not only ask you for a directory-folder for the received file, it will also ask you for a filename. You can type in the file-name now, but don't confirm it at the moment!
Again, looking at HyperTerminal:
Now confirm the "Start transfer" button and...
...then confirm the file-name in the communications-software immediately!
Depending on the file-size the transfer will be done within a few seconds.
You'll see this window (with similar content) in HyperTerminal during the transfer: